How to Add GPS Location and a Timestamp to iPhone Photos
The iPhone's own Camera app already records where and when a photo was taken — but it hides that information in invisible EXIF metadata that most apps strip out the moment you share the photo. If you actually want the time, date, and location visible on the photo itself, you need a stamp burned into the image. Here's how to set one up properly.
1. Grant location access — and understand what "While Using" means
Any app that stamps GPS coordinates onto your photos needs permission to read your location. On iPhone, this is controlled per-app in Settings → Privacy & Security → Location Services. Choosing "While Using the App" is the right call for a camera app: it only reads your location while the camera screen is actually open, not in the background.
If a stamp comes back showing "Detecting Location…" indefinitely, it's almost always one of two things: Location Services are off entirely, or the app's own permission was denied. Both are fixable from that same Settings screen.
2. Pick a coordinate format that matches how you'll use the photo
GPS coordinates can be displayed a few different ways, and the right one depends on what you're doing with the photo afterward:
- Decimal degrees (e.g. 45.5152° N, 122.6784° W) — the most common format, and the easiest to paste directly into Google Maps or Apple Maps.
- Degrees, minutes, seconds — more traditional, and still preferred in some surveying and navigation contexts.
- Signed vs. unsigned — signed formats use a minus sign for south/west latitudes and longitudes instead of a letter suffix, which some GIS tools expect.
If you're not sure, unsigned decimal degrees with a direction letter is the safest default — it's readable at a glance and unambiguous.
3. Decide what else belongs in the stamp
A good photo stamp isn't just coordinates. Depending on why you're stamping the photo, consider turning on:
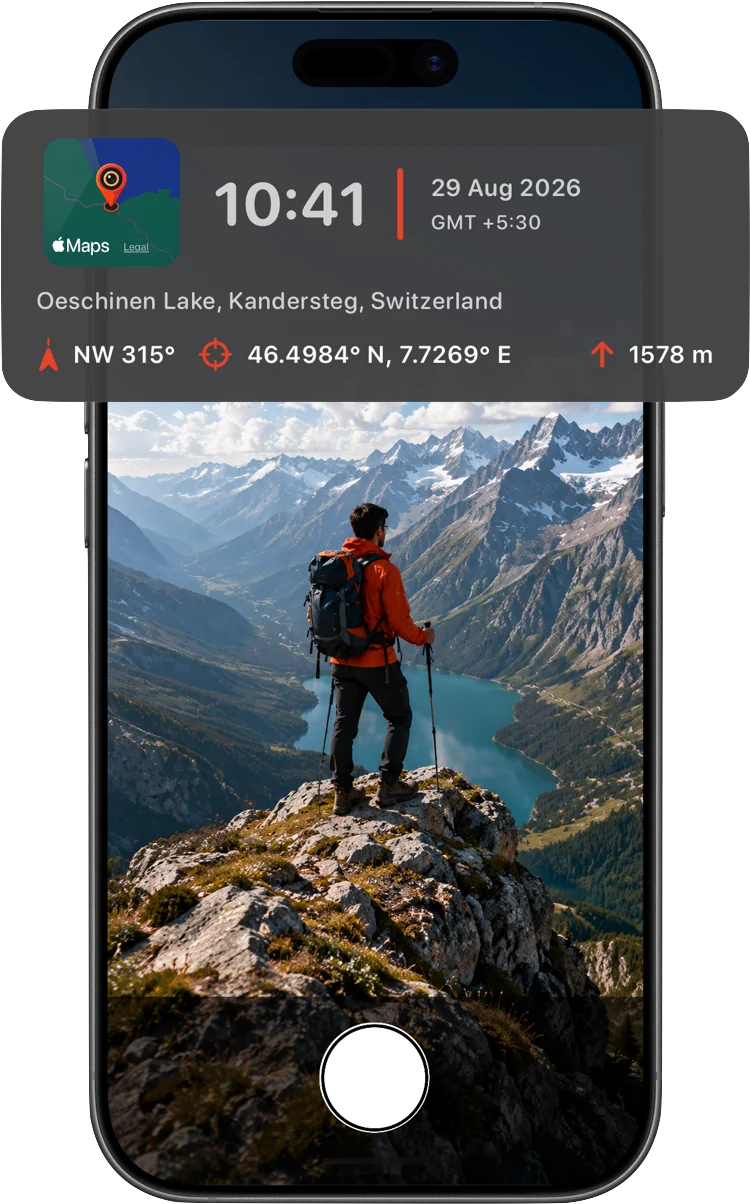
- Altitude — useful for hiking, aviation, or any context where elevation matters.
- Compass heading — which direction the camera was facing, handy for site surveys and directional documentation.
- Street address — a reverse-geocoded, human-readable location, resolved from your coordinates over the network.
- Map thumbnail — a small pinned map, so the location is understandable at a glance without decoding coordinates.
Turning fields off that you don't need keeps the stamp compact and legible, especially over a busy background.
4. Burn it in — don't rely on metadata alone
This is the part most people miss: EXIF location data is invisible, and it's frequently stripped automatically — by Messages, by social platforms, by some cloud backup services. If proving where and when a photo was taken matters (for work, for a dispute, for a record you want to keep intact), the location needs to be part of the actual image, not just attached metadata that can quietly disappear.
Timestamp Camera handles all of the above directly in the camera screen — permission, format, and every field described here — and burns the result into the photo or video at the moment you capture it, entirely on your device.
Want to try it? Timestamp Camera stamps time, date, GPS coordinates, altitude, and compass heading directly onto your photos and videos.